Integrating kickstart w/ CentOS 6 DVD ISO installation
In our DevOps environment, we’ve got a lot of developers who regularly build VMs. Sometimes they’re built locally on their workstations, or sometimes in the data center when they’re ready to formally move code. Admittedly, the IT VM provisioning process can be slow at times and we often see them get frustrated and take matters into their own hands. While this self-build method gets them their VM faster, they don’t always get IT’s supported “base image”. This can lead into integration and support problems later on when they’re trying to move this code into production that was developed against a non-standard OS. What to do?
OpenStack, or even OpenShift, is the long-term solution to this problem. However, until our OpenStack environment is stood up, we will need something else to address it right now. What if we could provide them an ISO that has our standard build integrated into it? Well! We are going to do just that. Read on…
Lets make our own ISO file with our standard kickstart image build into it. We’ll change the ISO boot menu options to only allow one install selection, and let the developers get to work! You will need the CentOS install images, and a workstation running an RPM anaconda based distribution. I used CentOS 6.5 for both.
Set up your build environment:
You will need the createrepo, isomd5sum, and genisoimage packages:
sudo yum install createrepo isomd5sum genisoimage
Setup a mount point for the DVD ISO, and mount it:
sudo mkdir -p /export/media/centos_build/DVD1
sudo mount -o loop CentOS-6.5-x86_64-bin-DVD1.iso /export/media/centos_build/DVD1
Next, make a working directory for what will be the new ISO image:
sudo mkdir -p /export/media/centos_build/kickstart/{isolinux,images,ks,CentOS}
sudo chown -R <user>:<user's group> /export/media/centos_build
Copy the mounted DVD ISO files into the working directory:
cp -Rp DVD1/isolinux/* kickstart/isolinux
cp DVD1/.discinfo kickstart/
cp -Rp DVD1/images/* kickstart/images/
chmod 664 kickstart/isolinux/isolinux.*
chmod 664 kickstart/ks/ks.cfg (This will be the location of your kickstart file. We'll create this below)
cp DVD1/Packages/*.rpm kickstart/CentOS
You’ll need a comps.xml file. This file describes the package groups included in the ISO. You can grab one from a CentOS repo:
cd kickstart/
wget http://mirror.centos.org/centos-6/6.5/os/x86_64/repodata/b4e0b9342ef85d3059ff095fa7f140f654c2cb492837de689a58c581207d9632-c6-x86_64-comps.xml
mv b4e0b9342ef85d3059ff095fa7f140f654c2cb492837de689a58c581207d9632-c6-x86_64-comps.xml comps.xml
Create the kickstart file. You can use system-config-kickstart to build a new one, or copy one from an already installed server’s /root/anaconda-ks.cfg file. If you don’t have system-config-kickstart, use yum to install it. The RedHat knowledgebase provides a list & explanation of all the available kickstart options. You should create the kickstart file as /export/media/centos_build/kickstart/ks/ks.cfg:
yum install system-config-kickstart
system-config-kickstart OR scp root@:/root/anaconda-ks.cfg /export/media/centos_build/kickstart/ks/ks.cfg
Now, add any packages you’d like to include on the ISO. If you’ve got in-house RPMs, or are sourcing them from somewhere else (epel, fedora, cfengine, puppetlabs, etc.), place the .RPM file in the kickstart/CentOS/ directory. In my case, I’m going to include two in-house developed CFEngine packages. The first package installs the CFEngine agent, and the second package bootstraps CFEngine. My goal is to have this ISO & kickstart file to automatically provision the VM into the centralized configuration management tool –> CFEngine. CFEngine will then take care of adding all the admin accounts, setting up NTP, SSH, etc. (This is the real advantage with creating this custom ISO!)
cp ~/cfengine.rpm /export/media/centos_build/kickstart/CentOS/
cp ~/cfengine-provision.rpm /export/media/centos_build/kickstart/CentOS/
In your kickstart file, be sure to have these package names listed in your %packages section. This is also a good time to add/remove any other packages you want. My %packages section will look like this:
%packages
@Core
openssh
openssh-clients
openssh-server
ntp
wget
cfengine
cfengine-provision
Now that we have our kickstart file finished, lets modify the ISO boot menu to use the kickstart file by default:
vi kickstart/isolinux/isolinux.cfg
My file looks like this. Be sure not to typo your kickstart file directory, otherwise it won’t work:
label linux
menu label ^Install w/ base image & CFEngine
menu default
kernel vmlinuz
append initrd=initrd.img ks=cdrom:/ks/ks.cfg
label vesa
menu label Install w/ ^base image & CFEngine (basic video driver)
kernel vmlinuz
append initrd=initrd.img xdriver=vesa nomodeset ks=cdrom:/ks/ks.cfg
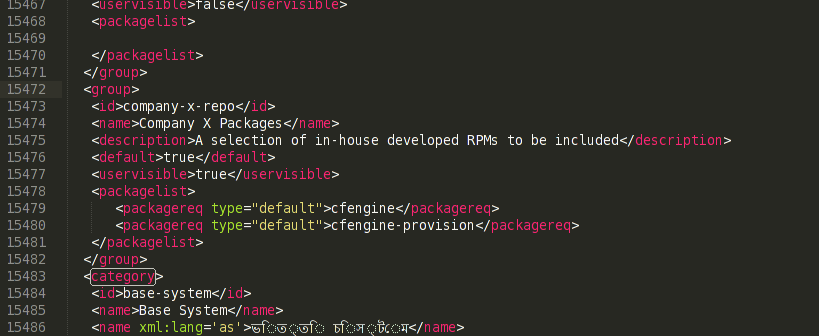
Now, if you’ve added packages into /export/media/centos_build/kickstart/CentOS/ directory, we will need to update the comps.xml file to reflect your changes. First, make a backup copy of comps.xml. Open the file for editing with your favourite XML editor. I’d suggest using an editor that can collapse groups of XML code as the comps.xml file is quite long. I use sublime text for this:
cd kickstart
vi comps.xml (or in my case using sublime)
After the last
You’ll need to add a new category as well. I made my entry at the end of all the
Use an XML syntax checker to make sure you didn’t make any errors. xmllint is a good one:
xmllint comps.xml
Building the ISO:
We’ll now need to re-initialize the repo list:
cd /export/media/centos_build/kickstart/
declare -x discinfo=$(head -1 .discinfo)
createrepo -u "media://$discinfo" -g comps.xml .
And build the ISO:
cd /export/media/centos_build
mkisofs -r -N -L -d -J -T -b isolinux/isolinux.bin -c isolinux/boot.cat -no-emul-boot -V CentOS6.5 -boot-load-size 4 -boot-info-table -o CentOS6.5.iso kickstart/
implantisomd5 CentOS6.5iso
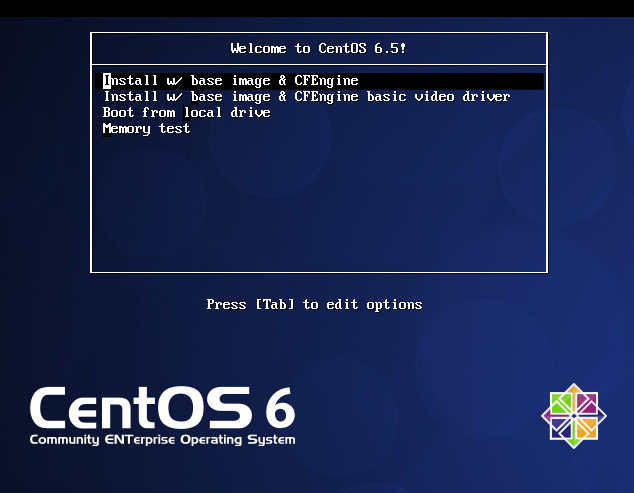
Now my boot menu looks like this and will automatically use my ks.cfg file for installation:
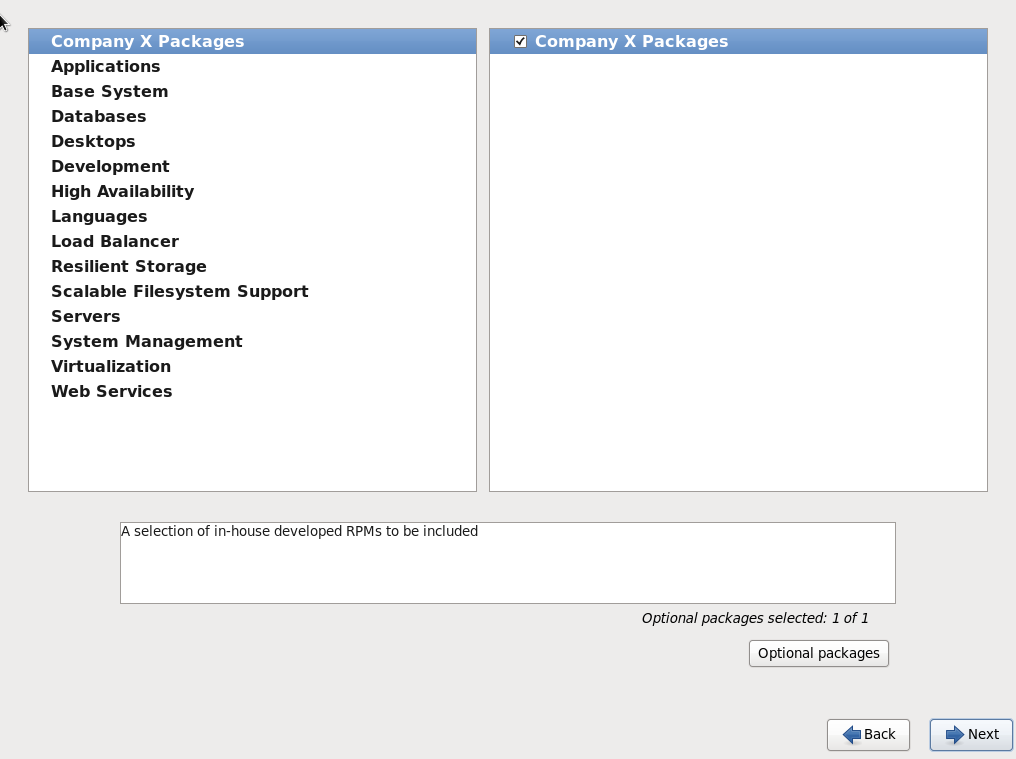
And although I didn’t provide this option in the boot menu, if you boot the graphical installer, you should see a new section for the packages you specified:
And that’s it! Put the ISO up on a file store or web server, and be satisfied that the developers are using a supported base OS install!


