Installing OpenStack – setting up a virtual lab environment
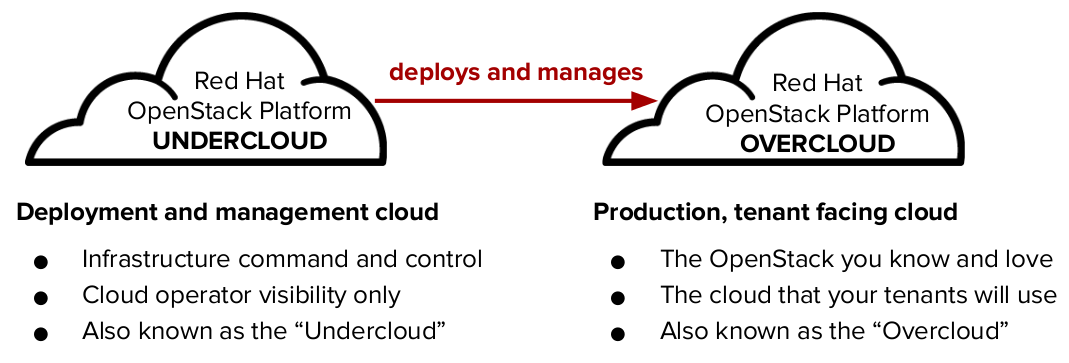
When talking TripleO, there’s two concepts introduced called the “undercloud”, and the “overcloud”. These are essentially the labels for each OpenStack environment when referring to “OpenStack on OpenStack” (TripleO). The undercloud is the OpenStack server that manages and deploys the more publicly consumable overcloud servers that make up the OpenStack environment that we’re after. Confused yet? 🙂 does a good job of illustrating this in a blog post:
To start with our OpenStack deployment, we’ll first start with setting up the undercloud server. We’re basically going to run through the recommended 10 node deployment in the Director installation guide. I’m using the latest RHEL7.2 as my OS, and have created a VM with the following specs:
- 16 GB RAM
- 8 vCPUs
- 80 GB disk
- 2 NICs, (one for a provisioning network, one for an external network)
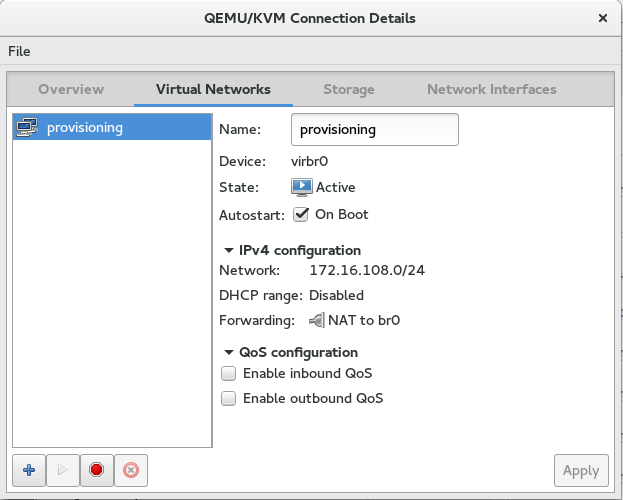
I’ll be using libvirt/KVM to set this up. I’ve created a linux bridge on my physical server, then have created a libvirt network on top of that. This network will be my provisioning network, and the linux bridge on it’s own will act as the external network for my OpenStack environment. We’re basically going with a single NIC deployment for simplicity sake, and are simulating trunking all the networks through this NIC, each with respective subnets. Don’t worry about that for now, more on that later. Make sure DHCP is disabled on the provisioning network:
$ sudo virsh net-dumpxml provisioning
<network connections='6' ipv6='yes'>
 <name>provisioning</name>
 <uuid>ec5de859-2e26-465b-944f-2811328f25ab</uuid>
 <forward dev='br0' mode='nat'>
   <nat>
     <port start='1024' end='65535'/>
   </nat>
   <interface dev='br0'/>
 </forward>
 <bridge name='virbr0' stp='on' delay='0'/>
 <mac address='52:54:00:56:7a:09'/>
 <ip address='172.16.108.1' netmask='255.255.255.0'>
 </ip>
</network>
(Or if you’re a GUI person):
While that covers the undercloud VM, let’s now create the overcloud VMs. We’re going to be using 3 controllers, 3 computes, and 3 ceph storage nodes for our deployment. They’ll have the following specs:
- Controller: 1 vCPU, 6 GB RAM, 40 GB disk, 2 NICs (first NIC is on the provisioning network, second is on the linux bridge)
- Compue: 4 vCPU, 6 GB RAM, 40 GB disk, 1 NIC (provisioning network)
- Storage: 1 vCPU, 6 GB RAM, 40 GB disk (OS), 8 GB disk (simulate ceph journal SSD), 100 GB disk (ceph osd), 1 NIC (provisioning network)
The reason we’re using 3 of each node is that it gives you true high availability with the controllers, as well as as much of a simulation of real world compute and software-defined-storage functionality. On your physical server, you want to make sure that virtualization extensions are enabled in the BIOS, and on your compute nodes you either inherit the host’s CPU characteristics, or you manually enable nested virtualization. This isn’t necessary for the overcloud deployment itself, but it is necessary to create an instance inside the OpenStack environment.
To enable nested virtualization, on both the hypervisor and compute nodes set this value in/etc/modprobe.d/kvm.conf
options kvm_intel nested=1
To see if nested virtualization is enabled:
$ cat /sys/module/kvm_intel/parameters/nested
Y
Once your undercloud VM is installed with the latest RHEL, you can continue with the steps in Chapter 4 of the install guide. Setup the stack user, create two directories, validate the hostname is set, register your system, enable the proper repos, update and reboot:
[root@director ~]# useradd stack
[root@director ~]# passwd stack  # specify a password
[root@director ~]# echo "stack ALL=(root) NOPASSWD:ALL" | tee -a /etc/sudoers.d/stack
[root@director ~]# chmod 0440 /etc/sudoers.d/stack
[root@director ~]# su - stack
[stack@director ~]$
[stack@director ~]$ mkdir ~/images
[stack@director ~]$ mkdir ~/templates
[stack@director ~]$ hostname    # Checks the base hostname
[stack@director ~]$ hostname -f # Checks the long hostname (FQDN)
[stack@director ~]$ sudo hostnamectl set-hostname manager.example.com
[stack@director ~]$ sudo hostnamectl set-hostname --transient manager.example.com
[stack@director ~]$ vi /etc/hosts
127.0.0.1   manager.example.com manager localhost localhost.localdomain localhost4 localhost4.localdomain4
192.168.122.10 director.example.com director
[stack@director ~]$ sudo subscription-manager repos --disable=*
[stack@director ~]$ sudo subscription-manager repos --enable=rhel-7-server-rpms --enable=rhel-7-server-extras-rpms --enable=rhel-7-server-openstack-9-rpms --enable=rhel-7-server-openstack-9-director-rpms --enable=rhel-7-server-rh-common-rpms
[stack@director ~]$ sudo yum update -y
[stack@director ~]$ sudo reboot
Then, install the director (TripleO) packages:
[stack@director ~]$ sudo yum install -y python-tripleoclient
The undercloud.conf file is where we make the configuration settings for the undercloud openstack environment. You can read through the guide for more details, but my undercloud.conf file looks like this. I’ve copied the default in, and grep’d out my changes. With my network gateway the first IP of my provisioning network (172.16.108.1), I’ve set that, as well as the undercloud server IP (172.16.108.2), and the remaining settings you can read. An important setting to note is the local_interface is set to the provisioning NIC on my VM (eth0 in this case, eth1 is my external linux bridge network):
$ cp /usr/share/instack-undercloud/undercloud.conf.sample ~/undercloud.conf
$ egrep -v '^#|^$' undercloud.conf
[DEFAULT]
image_path = /home/stack/images/
local_ip = 172.16.108.2/24
network_gateway = 172.16.108.1
undercloud_public_vip = 172.16.108.3
undercloud_admin_vip = 172.16.108.4
local_interface = eth0
network_cidr = 172.16.108.0/24
masquerade_network = 172.16.108.0/24
dhcp_start = 172.16.108.5
dhcp_end = 172.16.108.24
inspection_interface = br-ctlplane
inspection_iprange = 172.16.108.100,172.16.108.120
inspection_extras = true
undercloud_debug = true
ipxe_deploy = true
[auth]
Now that we’ve specified the undercloud’s configuration, we can run the install command that will install and setup the undercloud OpenStack software. Before we do this, I recommend taking a snapshot of the VM for easy rollback capability. You might decide later that you’ve made a configuration mistake, or that you want to redeploy from scratch. Regarding the overall networking layout, essentially what we’re deploying is this:

Nic 1 on each node is essentially acting as a trunk, carrying all the types of traffic in the OpenStack environment that aren’t on the external network. In an actual production deployment, you may want to separate these out further into their own physical networks, bonds, VLANs, etc. But for our purposes, everything is going to be on one NIC, in the 172.16.108.0/24 subnet. Because we’re using a virtual environment, we’re also omitting the IPMI network. Our node out-of-band management is going to be handled by the pxe_ssh driver. With this driver, the undercloud uses virsh to control the power management of our VMs.
$ openstack undercloud install
Finally, after several minutes, you should see a successful installation complete message:
...
[2016-09-10 20:32:35,353] (os-refresh-config) [INFO] Completed phase post-configure
os-refresh-config completed successfully
Generated new ssh key in ~/.ssh/id_rsa
Created flavor "baremetal" with profile "None"
Created flavor "control" with profile "control"
Created flavor "compute" with profile "compute"
Created flavor "ceph-storage" with profile "ceph-storage"
Created flavor "block-storage" with profile "block-storage"
Created flavor "swift-storage" with profile "swift-storage"

#############################################################################
Undercloud install complete.

The file containing this installation's passwords is at
/home/stack/undercloud-passwords.conf.

There is also a stackrc file at /home/stack/stackrc.

These files are needed to interact with the OpenStack services, and should be
secured.

#############################################################################
Congratulations, TripleO has been installed and configured. We’re ready to start the configuration of the overcloud nodes. Next post, I will get into the heat templates required to do this, and some notable configuration items in them.