How to install PiHole on Fedora
How to install PiHole on Fedora Server
-
Download the latest copy of Fedora Server. If installing on a Raspberry Pi, make sure you select the ARM archtiecture.
You can also use Fedora Media Writer for both downloading and writing the image to the storage device used in your Raspberry Pi (sd card, SSD, etc.)
-
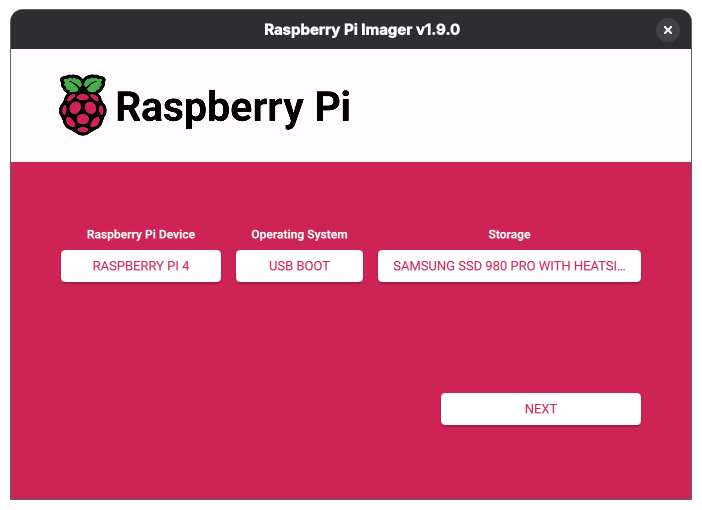
Install and open Raspberry Pi Imager. I like using this one as it helps you make EEPROM changes as well.
Select the Raspberry Pi model you’re using, the operating system/boot device, and the storage device to write it to. Click next and write to disk.
-
With your OS image written to storage device, attach the storage device to the Raspberry Pi. (ie insert the sdcard, or plugin USB to SATA cable of SSD). Boot the Raspberry Pi. You should now having a working default Fedora Server OS installed on your Raspberry Pi.
-
Connect to your Pi from either SSH or keyboard/mouse and Pi browser. Apply any OS configuration you may need. (Hostname, SSH keys, etc.). For a functioning PiHole, you will need to set SELinux to permissive, and allow some firewall ports. If you’re using the DHCP/NTP portions of PiHole, account for those below. I just use DNS/HTTP/HTTPS:
    # sed -i 's/^SELINUX=enforcing/SELINUX=permissive/' /etc/selinux/config
    # firewall-cmd --permanent --add-service=http --add-service=https --add-service=dns
    # firewall-cmd --reload
    # reboot
After a reboot, Use the one-step automated install of PiHole to install PiHole on the OS. The installer will finish after a few minutes and output the password/URL for you to login to PiHole on your device. It’s also a good idea to apply any OS updates and reboot.
-
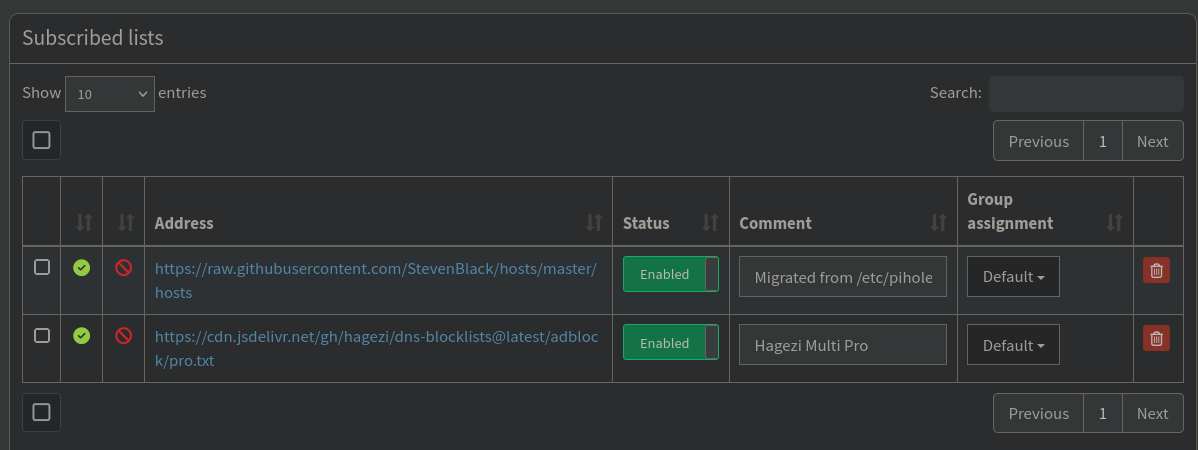
Login to PiHole and make any necessary configurations. Personally, I like to add a second blocklist, Hagezi Multi Pro, as well as deny some domains I feel are problematic. (TikTok, Roblox, etc.)
-
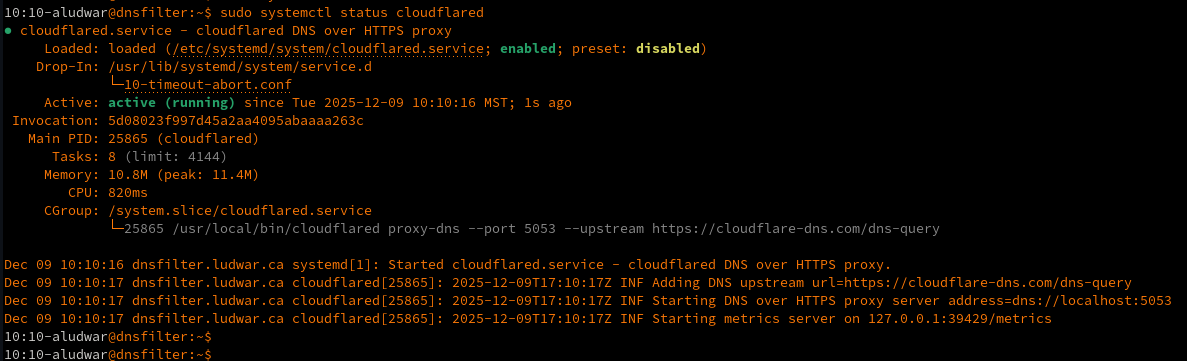
Setup DNS over HTTPS (DoH) for additional security with cloudflared. Granted, this doesn’t hide your DNS traffic from your ISP, it does help prevent MitM DNS attacks.
-
Enjoy a more performant, more secure, and ad-free home network!