Deploying an OpenStack cluster in a virtual lab environment
Previously, I went through a couple OpenStack topics on installers, and deploying an undercloud as part of a virtual OpenStack deployment. Today I’ll walk through the overcloud deployment, and hopefully by the end of this post you will have had enough details to get your own deployment up and running. This particular environment is for Red Hat OpenStack Platform 8 (Liberty), but the same steps will apply to Mitaka as well. There isn’t a ton of change in the deployment methods from Liberty to Mitaka, the templates here will apply to either.
Having previously worked through undercloud deployment, you should have a working and configured undercloud that’s ready to further configure the overcloud and how it is to be deployed. In the Director Installation and Usage guide, we’ll be starting from Step 4.7. You’ll want to obtain the overcloud images either directly from access.redhat.com, or from the rhosp-director-images RPMs. (It might be handy to have that guide open and follow along here. I won’t post every command from that guide here, but will do the areas that might not be so clear).
After obtaining the images and uploading them to the undercloud, you should see a similar list of available images to be used in deployment:
[stack@director ~]$ openstack image list
+--------------------------------------+------------------------+
| ID                                   | Name                   |
+--------------------------------------+------------------------+
| ac097539-2e58-49d0-9e10-105c27284609 | bm-deploy-ramdisk      |
| 8db87932-9967-488d-87fc-aac865bd006d | bm-deploy-kernel       |
| 52f99d8c-3bf1-4587-bec6-c2926e5ed86c | overcloud-full         |
| 56927154-a682-4cdc-8eae-29cd89f84747 | overcloud-full-initrd  |
| 35021423-984c-466a-8087-4a9f6f311691 | overcloud-full-vmlinuz |
+--------------------------------------+------------------------+
[stack@director ~]$
These images displayed here, as well as the ones copied to the /httpboot directory serve a couple purposes. The /httpboot images are introspection images, or what the undercloud host will copy to the overcloud nodes as their hardware is being inspected (or introspected as it’s also called). What this introspection process does is it takes an audit of the hardware you’re giving the overcloud, and it puts it in an inventory in the undercloud, so the undercloud knows a little about the nodes it’s about to provision. This is used to help classify baremetal servers into node types (compute, controller, etc.). The bm-deploy* images are used during firstboot (a PXE boot) for the baremetal hosts you’ve set in the overcloud. These baremetal images are used to get the overcloud node(s) to a basic networked OS, then it copies the overcloud-full images to disk, which the node then uses to permanently boot from in the traditional server OS booting process. I know it’s a little convoluted process, but each image is purposeful and this functionality is basically a replication of the PXE boot process you may be familiar with from a cobbler server, or other PXE boot environment.
During the undercloud installation process, neutron network entries used for provisioning get created. This is commonly known as the “control plane” network, of which handles the provisioning traffic for nodes, as well as all of the API and Management traffic between the nodes once the cluster is up and running. In a sincle-nic-vlan deployment (the one we will be doing), this physical control plane network will have this individual API and Management traffic broken out into different subnets and VLANs for separation.
[stack@director ~]$ neutron net-list
+--------------------------------------+----------+------------------------------------------------------+
| id                                   | name     | subnets                                              |
+--------------------------------------+----------+------------------------------------------------------+
| f797f675-3656-4965-b3c4-dee4ee0cac32 | ctlplane | 21010ab7-27b0-4b33-a062-3423f60db79f 172.16.108.0/24 |
+--------------------------------------+----------+------------------------------------------------------+
[stack@director ~]$
[stack@director ~]$
[stack@director ~]$ neutron subnet-list
+--------------------------------------+------+-----------------+---------------------------------------------------+
| id                                   | name | cidr            | allocation_pools                                  |
+--------------------------------------+------+-----------------+---------------------------------------------------+
| 21010ab7-27b0-4b33-a062-3423f60db79f |      | 172.16.108.0/24 | {"start": "172.16.108.5", "end": "172.16.108.24"} |
+--------------------------------------+------+-----------------+---------------------------------------------------+
After completing Step 4.8 in assigning a nameserver to this neutron network, we’ve completed the undercloud configuration and are ready to move on to configuring the overcloud.
Chapter 5 starts off with configuring the basic overcloud requirements. I’ve previously decided that we’re going to be doing the “Medium Overcloud with High Availability and Ceph Storage” deployment scenario. You can check out other deployment scenarios in Chatper 3.1 in the same guide. The deployment scenario we’re going with has 3 controllers, 3 computes, and 3 ceph storage nodes. I think this will give you good exposure to all the important aspects of a truly production ready OpenStack deployment. This will give us true high availability with 3 controllers. It also gives us flexibility in compute capacity to create different availability zones, or tiers of compute offerings with exposure to live migration, as well as instance HA for automatic failover (configured separately after deployment.) Also, this gives you good exposure to ceph software defined storage, configured in a clustered environment, with a reasonable amount of storage to create instances and volumes without restriction and in a way you can explore its performance. The only thing you might want to do differently with this deployment is separate the traffic out further to dedicated NICs or bonds for increased resiliency, or add more compute/storage nodes for capacity.
Beginning with Step 5.1, we need to register the overcloud nodes with the undercloud. This basically pre-loads the undercloud inventory (ironic) with the overcloud nodes and their specs. The file used to do this is instackenv.json``, and it is in JSON format. Previously in the undercloud deployment post, you should have created the overcloud nodes as VMs. For reference, here’s what you should create:
- 3x Controller VM: 1 vCPU, 6 GB RAM, 40 GB disk, 2 NICs (first NIC is on the provisioning network, second is on the linux bridge)
- 3x Compue VM: 4 vCPU, 6 GB RAM, 40 GB disk, 1 NIC (provisioning network)
- 3x Storage VM: 1 vCPU, 6 GB RAM, 40 GB disk (OS), 8 GB disk (simulate ceph journal SSD), 100 GB disk (ceph osd), 1 NIC (provisioning network)
In the instackenv.json`` file, we’re going to include basic information about the above overcloud VMs. Here’s the first and last entry of mine:
[stack@director ~]$ cat instackenv.json
{
    "nodes":[
        {
            "mac":[
                "52:54:00:bb:26:2f"
            ],
            "cpu":"4",
            "memory":"6144",
            "disk":"40",
            "arch":"x86_64",
            "pm_type":"pxe_ssh",
            "pm_user":"root",
            "pm_password":"-----BEGIN RSA PRIVATE KEY-----\nMII...Vl9E\n-----END RSA PRIVATE KEY-----",
            "pm_addr":"10.0.8.4"
        },
...
        {
            "mac":[
                "52:54:00:10:91:4b"
            ],
            "cpu":"1",
            "memory":"6144",
            "disk":"40",
            "arch":"x86_64",
            "pm_type":"pxe_ssh",
            "pm_user":"root",
            "pm_password":"-----BEGIN RSA PRIVATE KEY-----\nMII...Vl9E\n-----END RSA PRIVATE KEY-----",
            "pm_addr":"10.0.8.4"
    }
    ]
}
The first node is a compute node, and the last node is a storage node. (There’s the other 7 nodes in between these two, but I’ve truncated it for brevity). This file expects the MAC address of the provisioning NIC, and since we’re using the pxe_ssh driver in the virtual lab, we’ll be populating the pm_user, pm_password, and pm_addr fields to accommodate. If you’re using KVM for your virtual environment (recommended), this is what you’d use for deployment. If you’re using VMware, you’ll want to use the fake_pxe driver. More info on both of these drivers are in Appendix B.6, and B.7 of this deployment guide. The reason I say the pxe_ssh driver is preferred is because all the power management needed to be done using the fake_pxe driver with VMware needs to be done manually. (Rebooting of nodes during provisioning is automatically handled by ironic and the iDRAC/iLO/UCS/pxe_ssh drivers. You’ll need to manually boot and reboot VMs if you’re using the VMware driver, so the KVM option on a new deployment is much easier to use to get familiar with the provisioning process first).
Back to the instackenv.json file, the pm_password field expects the private SSH key of the pm_user, not it’s password. It expects a “\n” character at the end of the first line, and the beginning of the last to parse the key correctly. Also, you’ll want to setup password-less SSH access from your undercloud (director) node, to the hypervisor host as the pxe_ssh driver is essentially a wrapper to virsh, which handles the power management of your KVM VMs. The pm_addr in my case here is my hypervisor host IP. Before importing this file, you’ll want to check that you can successfully SSH from the undercloud to the hypervisor without a password as both the root and stack users. Use the ssh-copy-id tool for this.
Once that’s done, proceed with the import of the instackenv.json file, complete assigning the boot images to all nodes, and verify ironic sees all expected nodes in it’s inventory. If the import fails, it will throw an error to the console. Common things to check are making sure the MACs set are ones from the provisioning NIC for each node, as well as the password-less SSH access working. The undercloud node here will verify the presence of the VMs with virsh during this import. A successful node listing should display all 9 of your nodes:
[stack@director ~]$ ironic node-list
+--------------------------------------+------+---------------+-------------+--------------------+-------------+
| UUID                                 | Name | Instance UUID | Power State | Provisioning State | Maintenance |
+--------------------------------------+------+---------------+-------------+--------------------+-------------+
| d28cacc9-3d71-40ab-be46-39c622210dc1 | None | None          | power off   | available          | False       |
| 30a97b2b-a7cb-43f9-a773-06ad4629a431 | None | None          | power off   | available          | False       |
| 1e9ee59d-8e2c-4f82-ad51-f1bc22ac92ef | None | None          | power off   | available          | False       |
| db093cf6-1ba9-4c56-aa06-6d67971cdb7a | None | None          | power off   | available          | False       |
| 791d7b74-253f-461f-bbfc-0cf8118cca7a | None | None          | power off   | available          | False       |
| e7c7ab29-42e1-4676-92b7-82a507c9b86b | None | None          | power off   | available          | False       |
| e0d499ae-ac91-42e4-97d4-bda73aac0580 | None | None          | power off   | available          | False       |
| 72f8bfef-4800-42a8-9f7f-cae0ba393bbc | None | None          | power off   | available          | False       |
| 8d982885-dcde-49bf-8330-a3ae462e7308 | None | None          | power off   | available          | False       |
+--------------------------------------+------+---------------+-------------+--------------------+-------------+
The next step is to inspect (introspect) these nodes hardware details. You’ve already populated the major details it needs, so this step is mostly to discover additional root disks, and for automated node classification if you’re importing 100s of nodes at a time. This step isn’t mandatory, but I’d recommend doing an introspection and watching your VM console just to become familiar with the boot process.
The next (and critical) step is to tag these nodes with the overcloud profile you want them deployed as. So compute, controller, ceph-storage, etc. In our case, we’ll tag the three compute nodes with compute, the controllers with controller, and the ceph storage with ceph-storage. Pretty straight forward right? This is often an overlooked step and causes many issues come deployment time if your nodes are tagged in a different way than what you’ve told the undercloud to deploy. When deploying, remember that the nodes available to you during a deploy are the ones in the ironic inventory so in the future if you decide to change the 3 ceph-storage nodes to 3 additional compute nodes, you’ll need to come back here and re-tag them as such.
My first three ironic nodes are compute nodes, my second three are controllers, and my third three are storage. So I’ll be running 9 ironic commands, one against each node to tag them with their profile:
[stack@director ~]$ ironic node-update d28cacc9-3d71-40ab-be46-39c622210dc1 add properties/capabilities='profile:compute,boot_option:local'
[stack@director ~]$ ironic node-update 30a97b2b-a7cb-43f9-a773-06ad4629a431 add properties/capabilities='profile:compute,boot_option:local'
[stack@director ~]$
[stack@director ~]$ ironic node-update <UUID> add properties/capabilities='profile:control,boot_option:local'
[stack@director ~]$ ironic node-update <UUID> add properties/capabilities='profile:ceph-storage,boot_option:local'
… you get the idea. After this is node tagging is done, you can check each node or list the tagged profiles all at once:
[stack@director ~]$ ironic node-show d28cacc9-3d71-40ab-be46-39c622210dc1
+------------------------+--------------------------------------------------------------------------+
| Property               | Value                                                                    |
+------------------------+--------------------------------------------------------------------------+
| target_power_state     | None                                                                     |
| extra                  | {}                                                                       |
| last_error             | None                                                                     |
| updated_at             | 2016-09-24T18:59:37+00:00                                                |
| maintenance_reason     | None                                                                     |
| provision_state        | available                                                                |
| clean_step             | {}                                                                       |
| uuid                   | d28cacc9-3d71-40ab-be46-39c622210dc1                                     |
| console_enabled        | False                                                                    |
| target_provision_state | None                                                                     |
| provision_updated_at   | 2016-09-24T17:52:05+00:00                                                |
| maintenance            | False                                                                    |
| inspection_started_at  | None                                                                     |
| inspection_finished_at | None                                                                     |
| power_state            | power off                                                                |
| driver                 | pxe_ssh                                                                  |
| reservation            | None                                                                     |
| properties             | {u'memory_mb': u'6144', u'cpu_arch': u'x86_64', u'local_gb': u'40',      |
|                        | u'cpus': u'4', u'capabilities': u'profile:compute,boot_option:local'}    |
| instance_uuid          | None                                                                     |
| name                   | None                                                                     |
| driver_info            | {u'ssh_username': u'root', u'deploy_kernel': u'8db87932-9967-488d-87fc-  |
|                        | aac865bd006d', u'deploy_ramdisk':                                        |
|                        | u'ac097539-2e58-49d0-9e10-105c27284609', u'ssh_key_contents': u'-----    |
|                        | BEGIN RSA PRIVATE KEY-----                                               |
|                        | MII...Vl9E                                         |
|                        | -----END RSA PRIVATE KEY-----',                                          |
|                        | u'ssh_virt_type': u'virsh', u'ssh_address': u'10.0.8.4'}                 |
| created_at             | 2016-08-08T14:15:54+00:00                                                |
| driver_internal_info   | {u'agent_url': u'http://172.16.108.8:9999', u'root_uuid_or_disk_id':     |
|                        | u'b977c2c1-dc3c-4853-a353-0598c429fce6', u'is_whole_disk_image': False,  |
|                        | u'agent_last_heartbeat': 1474667870}                                     |
| chassis_uuid           |                                                                          |
| instance_info          | {}                                                                       |
+------------------------+--------------------------------------------------------------------------+
[stack@director ~]$ openstack overcloud profiles list
+--------------------------------------+-----------+-----------------+-----------------+-------------------+
| Node UUID                            | Node Name | Provision State | Current Profile | Possible Profiles |
+--------------------------------------+-----------+-----------------+-----------------+-------------------+
| d28cacc9-3d71-40ab-be46-39c622210dc1 |           | available       | compute         |                   |
| 30a97b2b-a7cb-43f9-a773-06ad4629a431 |           | available       | compute         |                   |
| 1e9ee59d-8e2c-4f82-ad51-f1bc22ac92ef |           | available       | compute         |                   |
| db093cf6-1ba9-4c56-aa06-6d67971cdb7a |           | available       | control         |                   |
| 791d7b74-253f-461f-bbfc-0cf8118cca7a |           | available       | control         |                   |
| e7c7ab29-42e1-4676-92b7-82a507c9b86b |           | available       | control         |                   |
| e0d499ae-ac91-42e4-97d4-bda73aac0580 |           | available       | ceph-storage    |                   |
| 72f8bfef-4800-42a8-9f7f-cae0ba393bbc |           | available       | ceph-storage    |                   |
| 8d982885-dcde-49bf-8330-a3ae462e7308 |           | available       | ceph-storage    |                   |
+--------------------------------------+-----------+-----------------+-----------------+-------------------+
[stack@director ~]$
This shows my first node is tagged as compute, and the summary of all nodes says I’ve got 3 of each profile tagged. Awesome! Ironic now knows about all the overcloud nodes we want to provision, and it knows which role each should have. Now for probably the most complicated part – heat templates.
This is probably the most confusing part of an overcloud deployment, is how to setup the heat templates so that the nodes get deployed in the architecture that you want them to. In this section (now in Chapter 6 of the guide), I’ll just give you the templates we’re going to use, and briefly explain why. As you get some practice deploying a few environments and seeing the configuration first hand, these templates will start to make more sense. For me this was a little information overload reading all the options I could deploy with, it made understanding the one I need difficult to identify at first.
The general rule of thumb with an overcloud deployment is network isolation is a good thing. We want to separate the API traffic and data traffic to it’s own networks, and VLANs. This is true regardless of the size of your cloud, the only difference is how much farther you go in separating your traffic. So our first decision is that we’re going to use network isolation. The second decision we’re going to make is that we’re going to use the heat templates that setup for a single-nic-vlans deployment. Because we’re in a virtual environment, this option makes the most sense. There’s a myriad of other templates you can use depending on your network architecture, another popular one is **multiple-nics**, and bond-with-vlans. Those templates are for if you’ve got 6 NICS on your physical servers, or if you’re bonding 2 NICs for the provisioning network, and 2 more for the API and Mangement traffic in an LACP, linux, or openvswitch bond. For our use, copy the single-nic-vlans`` templates:
$ cp -r /usr/share/openstack-tripleo-heat-templates/network/config/single-nic-vlans ~/templates/nic-configs
$ cp /usr/share/openstack-tripleo-heat-templates/environments/network-environment.yaml ~/templates/network-environment.yaml
$ cp /usr/share/openstack-tripleo-heat-templates/environments/storage-environment.yaml ~/templates/storage-environment.yaml
I’ve uploaded my yaml templates to my github repo, so you should be able to use these verbatim assuming you’ve setup your VMs and undercloud exactly as I have. I’ll dive into some of the notable details though. Keep in mind that these are .yaml files, and indenting is important.
**network-environment.yaml:
**In this file, you’ll want to make sure that the nic-configs templates path in the resource_registry section references where you’ve placed those template files. Example:
...
resource_registry:
  OS::TripleO::BlockStorage::Net::SoftwareConfig: /home/stack/templates/nic-configs/cinder-storage.yaml
  OS::TripleO::Compute::Net::SoftwareConfig: /home/stack/templates/nic-configs/compute.yaml
  OS::TripleO::Controller::Net::SoftwareConfig: /home/stack/templates/nic-configs/controller.yaml
  OS::TripleO::ObjectStorage::Net::SoftwareConfig: /home/stack/templates/nic-configs/swift-storage.yaml
  OS::TripleO::CephStorage::Net::SoftwareConfig: /home/stack/templates/nic-configs/ceph-storage.yaml
...
Also, in addition to assigning subnets to each network, take care to note the default routes of your external network, control plane network, and what the IP of your undercloud server is. These need to be reachable and set correctly, otherwise you’ll have networking problems in your overcloud at deployment time, and the deployment will fail. Since my external network has it’s own router gateway, and my control plane network (the virtual provisioning network) also has it’s own gateway, I’ve set these parameters accordingly, and set the EC2MetadataIP to the IP of my undercloud which is one IP above (Depending on your virtual environment setup, these values may differ slightly. It’s possible to have control plane and undercloud IP gateway the same – again depending on your virtual environment):
  # Set to the router gateway on the external network
  ExternalInterfaceDefaultRoute: 10.0.8.1
  # Gateway router for the provisioning network (or Undercloud IP)
  ControlPlaneDefaultRoute: 172.16.108.1
  # The IP address of the EC2 metadata server. Generally the IP of the Undercloud
  EC2MetadataIp: 172.16.108.2
  # Define the DNS servers (maximum 2) for the overcloud nodes
  DnsServers: ["10.0.8.1","8.8.8.8"]
storage-environment.yaml:
In this file, we’re going to say we want to deploy using Ceph, and will take most of the defaults already set, except we’re going to add in an ExtraConfig section to assign a journal disk, and osd disk for Ceph. Example:
parameter_defaults:

#### BACKEND SELECTION ####

## Whether to enable iscsi backend for Cinder.
 CinderEnableIscsiBackend: false
 ## Whether to enable rbd (Ceph) backend for Cinder.
 CinderEnableRbdBackend: true
 ## Whether to enable NFS backend for Cinder.
 CinderEnableNfsBackend: false
 ## Whether to enable rbd (Ceph) backend for Nova ephemeral storage.
 NovaEnableRbdBackend: true
 ## Glance backend can be either 'rbd' (Ceph), 'swift' or 'file'.
 GlanceBackend: file
...

  ExtraConfig:
    ceph::profile::params::osds:
      '/dev/vdc':
        journal: '/dev/vdb'
Now, of the single-nic-with-vlans files now in your nic-configs directory, we really only need to edit one file – the controller.yaml file. This is because this is the only host which has an extra external NIC, the rest of the templates already jive with the provisioning NIC being nic1. So I’ve edited the controller.yaml file as such:
controller.yaml:
...
          network_config:
            -
              type: ovs_bridge
              name: {get_input: bridge_name}
              use_dhcp: false
              dns_servers: {get_param: DnsServers}
              addresses:
                -
                  ip_netmask:
                    list_join:
                      - '/'
                      - - {get_param: ControlPlaneIp}
                        - {get_param: ControlPlaneSubnetCidr}
              routes:
                -
                  ip_netmask: 169.254.169.254/32
                  next_hop: {get_param: EC2MetadataIp}
              members:
                -
                  type: interface
                  name: nic1
                  # force the MAC address of the bridge to this interface
                  primary: true
#               -
#                 type: vlan
#                 vlan_id: {get_param: ExternalNetworkVlanID}
#                 addresses:
#                 -
#                   ip_netmask: {get_param: ExternalIpSubnet}
#                 routes:
#                   -
#                     default: true
#                     next_hop: {get_param: ExternalInterfaceDefaultRoute}

                -
                  type: vlan
                  vlan_id: {get_param: InternalApiNetworkVlanID}
                  addresses:
                    -
                      ip_netmask: {get_param: InternalApiIpSubnet}
                -
                  type: vlan
                  vlan_id: {get_param: StorageNetworkVlanID}
                  addresses:
                    -
                      ip_netmask: {get_param: StorageIpSubnet}
                -
                  type: vlan
                  vlan_id: {get_param: StorageMgmtNetworkVlanID}
                  addresses:
                    -
                      ip_netmask: {get_param: StorageMgmtIpSubnet}
                -
                  type: vlan
                  vlan_id: {get_param: TenantNetworkVlanID}
                  addresses:
                    -
                      ip_netmask: {get_param: TenantIpSubnet}
                #-  # Uncomment when including environments/network-management.yaml
                #  type: vlan
                #  vlan_id: {get_param: ManagementNetworkVlanID}
                #  addresses:
                #    -
                #      ip_netmask: {get_param: ManagementIpSubnet}
            - type: interface
              name: nic2
              addresses:
              -
                ip_netmask: {get_param: ExternalIpSubnet}
              routes:
              -
                ip_netmask: 0.0.0.0/0
                next_hop: {get_param: ExternalInterfaceDefaultRoute}
Here we tell heat that this network interface type is an OVS Bridge (ovs_bridge). And that it’s going to be using the control plane network details, with nic1 as a member interface. In that ovs_bridge, we include all of the API networks and their VLANs. This is the config that isolates all the traffic over the provisioning NIC. Since I’ve attached a second NIC as an external nic, I’ve created a new interface entry with the external network details, and commented out that inclusion in the provisioning NIC.
Done! The last thing that’s good to do is set a timezone for the overcloud, you can use timezone.yaml for this:
[stack@director ~]$ cat templates/timezone.yaml
parameter_defaults:
  TimeZone: 'America/Edmonton'
Now that we’ve got all our yaml files created the way we want, it’s time to deploy the overcloud. We’re up to Chapter 7 now, step 7.3 to be specific. We’re going to create a deploy command that should deploy our overcloud for us. In this deploy command, we’re going to pass all the environment template files we’ve created so that heat understands how to deploy our overcloud. We’ll also set a couple of other useful flags. This command is usually best to do inside a bash script, as you may end up running it multiple times, and you’ll also need it for any future scaling events you’ll want to do with your overcloud. Here’s my deploy command:
[stack@director ~]$ cat deploy.sh
#!/bin/bash

openstack overcloud deploy --templates -e /usr/share/openstack-tripleo-heat-templates/environments/network-isolation.yaml \
-e ~/templates/network-environment.yaml \
-e ~/templates/storage-environment.yaml \
-e ~/templates/timezone.yaml \
--control-scale 3 --compute-scale 3 --ceph-storage-scale 3 --control-flavor control --compute-flavor compute --ceph-storage-flavor ceph-storage \
--ntp-server 0.ca.pool.ntp.org --neutron-network-type vxlan --neutron-tunnel-types vxlan \
--validation-errors-fatal --validation-warnings-fatal --timeout 90
We’re including the network isolation template to indicate we want to isolate the networks. Also included is our network and storage templates, the timezone, and the node count and node profile of each of our overcloud nodes. Additionally we set an NTP server (very important for the time to be correct among all nodes), and the tunnel types for neutron. I like to include the validation flags as well, as they’ll fail the deploy right away if it notices any misconfigs in your yaml files, which makes it quicker to fix. Also, the timeout flag specifies how long to wait before timing out the create if it gets stuck on a task. This way if you do hit an error, you’re not waiting hours for the deploy to report back that it failed.
And go!
[stack@director ~]$ ./deploy.sh
Deploying templates in the directory /usr/share/openstack-tripleo-heat-templates
2016-09-12 02:14:08 [overcloud]: CREATE_IN_PROGRESS  Stack CREATE started
2016-09-12 02:14:08 [MysqlRootPassword]: CREATE_IN_PROGRESS  state changed
2016-09-12 02:14:08 [MysqlClusterUniquePart]: CREATE_IN_PROGRESS  state changed
2016-09-12 02:14:08 [HorizonSecret]: CREATE_IN_PROGRESS  state changed
2016-09-12 02:14:08 [RabbitCookie]: CREATE_IN_PROGRESS  state changed
2016-09-12 02:14:08 [Networks]: CREATE_IN_PROGRESS  state changed
2016-09-12 02:14:08 [HeatAuthEncryptionKey]: CREATE_IN_PROGRESS  state changed
2016-09-12 02:14:08 [PcsdPassword]: CREATE_IN_PROGRESS  state changed
2016-09-12 02:14:08 [VipConfig]: CREATE_IN_PROGRESS  state changed
2016-09-12 02:14:08 [overcloud-Networks-qg44kir5mx27]: CREATE_IN_PROGRESS  Stack CREATE started
2016-09-12 02:14:08 [ExternalNetwork]: CREATE_IN_PROGRESS  state changed
2016-09-12 02:14:09 [MysqlRootPassword]: CREATE_COMPLETE  state changed
2016-09-12 02:14:09 [HorizonSecret]: CREATE_COMPLETE  state changed
2016-09-12 02:14:09 [RabbitCookie]: CREATE_COMPLETE  state changed
2016-09-12 02:14:09 [MysqlClusterUniquePart]: CREATE_COMPLETE  state changed
....
2016-09-12 02:39:42 [overcloud-CephStorageNodesPostDeployment-j4aypgomqfrc-CephStorageDeployment_Step1-ggn6czwitcff]: UPDATE_COMPLETE  Stack UPDATE completed successfully
2016-09-12 02:39:43 [1]: SIGNAL_COMPLETE  Unknown
2016-09-12 02:39:43 [CephStorageDeployment_Step1]: CREATE_COMPLETE  state changed
2016-09-12 02:39:43 [ExtraConfig]: CREATE_IN_PROGRESS  state changed
2016-09-12 02:39:43 [overcloud-CephStorageNodesPostDeployment-j4aypgomqfrc-ExtraConfig-t3xjuf2ebi2n]: CREATE_IN_PROGRESS  Stack CREATE started
2016-09-12 02:39:43 [CephStorageDeployment]: SIGNAL_COMPLETE  Unknown
2016-09-12 02:39:44 [overcloud-CephStorageNodesPostDeployment-j4aypgomqfrc-ExtraConfig-t3xjuf2ebi2n]: CREATE_COMPLETE  Stack CREATE completed successfully
2016-09-12 02:39:44 [NetworkDeployment]: SIGNAL_COMPLETE  Unknown
2016-09-12 02:39:45 [ExtraConfig]: CREATE_COMPLETE  state changed
2016-09-12 02:39:45 [overcloud-CephStorageNodesPostDeployment-j4aypgomqfrc]: CREATE_COMPLETE  Stack CREATE completed successfully
2016-09-12 02:39:46 [CephStorageNodesPostDeployment]: CREATE_COMPLETE  state changed
2016-09-12 02:39:46 [overcloud]: CREATE_COMPLETE  Stack CREATE completed successfully
Stack overcloud CREATE_COMPLETE
/home/stack/.ssh/known_hosts updated.
Original contents retained as /home/stack/.ssh/known_hosts.old
PKI initialization in init-keystone is deprecated and will be removed.
Warning: Permanently added '172.16.108.24' (ECDSA) to the list of known hosts.
No handlers could be found for logger "oslo_config.cfg"
2016-09-11 20:39:57.599 15222 WARNING keystone.cmd.cli [-] keystone-manage pki_setup is not recommended for production use.
The following cert files already exist, use --rebuild to remove the existing files before regenerating:
/etc/keystone/ssl/certs/ca.pem already exists
/etc/keystone/ssl/private/signing_key.pem already exists
/etc/keystone/ssl/certs/signing_cert.pem already exists
Connection to 172.16.108.24 closed.
Overcloud Endpoint: http://10.0.8.200:5000/v2.0
Now assuming you’ve followed all the steps correctly, you should end up with your 9 node deployed into an OpenStack cluster, and get a successful deployment message like the above. Nova should show you your 9 nodes now deployed:
[stack@director ~]$ nova list
+--------------------------------------+-------------------------+--------+------------+-------------+------------------------+
| ID                                   | Name                    | Status | Task State | Power State | Networks               |
+--------------------------------------+-------------------------+--------+------------+-------------+------------------------+
| b7d9439f-e5a5-41d2-a912-d72a969b5b26 | overcloud-cephstorage-0 | ACTIVE | -          | Running     | ctlplane=172.16.108.14 |
| 63eb5320-c0be-48e0-ae57-9e5494ec6352 | overcloud-cephstorage-1 | ACTIVE | -          | Running     | ctlplane=172.16.108.13 |
| aca5a10e-564c-49dc-acc6-d1cbc1ef22ad | overcloud-cephstorage-2 | ACTIVE | -          | Running     | ctlplane=172.16.108.15 |
| 8dca0cab-b463-41ba-abb1-b154618d9f2c | overcloud-compute-0     | ACTIVE | -          | Running     | ctlplane=172.16.108.20 |
| 4e0c0910-dd1a-4e35-b6f7-7a477be12237 | overcloud-compute-1     | ACTIVE | -          | Running     | ctlplane=172.16.108.19 |
| 7b49ba02-8900-4117-8970-633f9d51932a | overcloud-compute-2     | ACTIVE | -          | Running     | ctlplane=172.16.108.21 |
| f394ce05-360c-454c-b302-d4c46caeacf7 | overcloud-controller-0  | ACTIVE | -          | Running     | ctlplane=172.16.108.16 |
| e9f40e92-9f6b-482b-8607-ca90e0e1ce96 | overcloud-controller-1  | ACTIVE | -          | Running     | ctlplane=172.16.108.17 |
| 0873640f-29c5-4978-89be-82ff2b50d56c | overcloud-controller-2  | ACTIVE | -          | Running     | ctlplane=172.16.108.18 |
+--------------------------------------+-------------------------+--------+------------+-------------+------------------------+
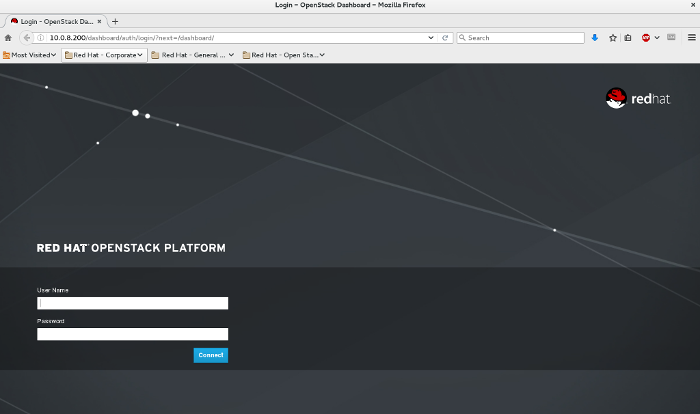
And browsing to your public endpoint should give you Horizon (you can find admin login credentials in the overcloudrc file):
After logging in, you should see the 3 available compute nodes, and their 300GB ceph cluster available to them:

Congratulations! You’ve stood up your first OpenStack environment. If you get stuck at any step along the way, comment below. I’ll point you in the right direction to get it deployed.